Media
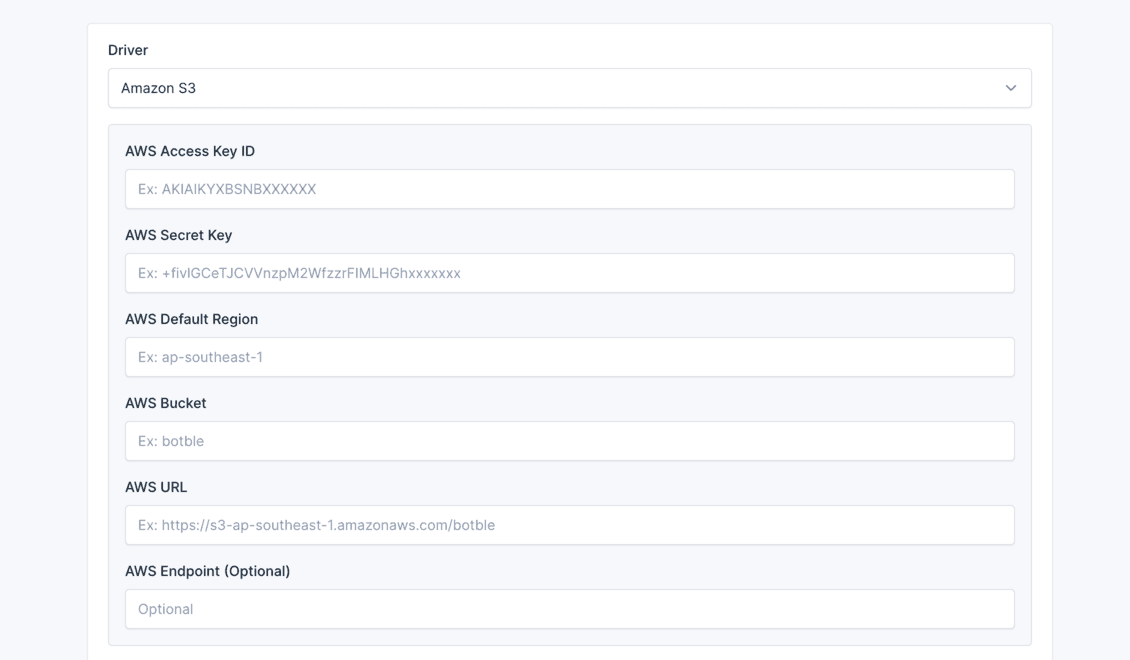
Setup Amazon S3
In admin panel, go to Settings -> Media to configure S3 for storage.
Video Tutorial
Watch this video for a step-by-step guide:
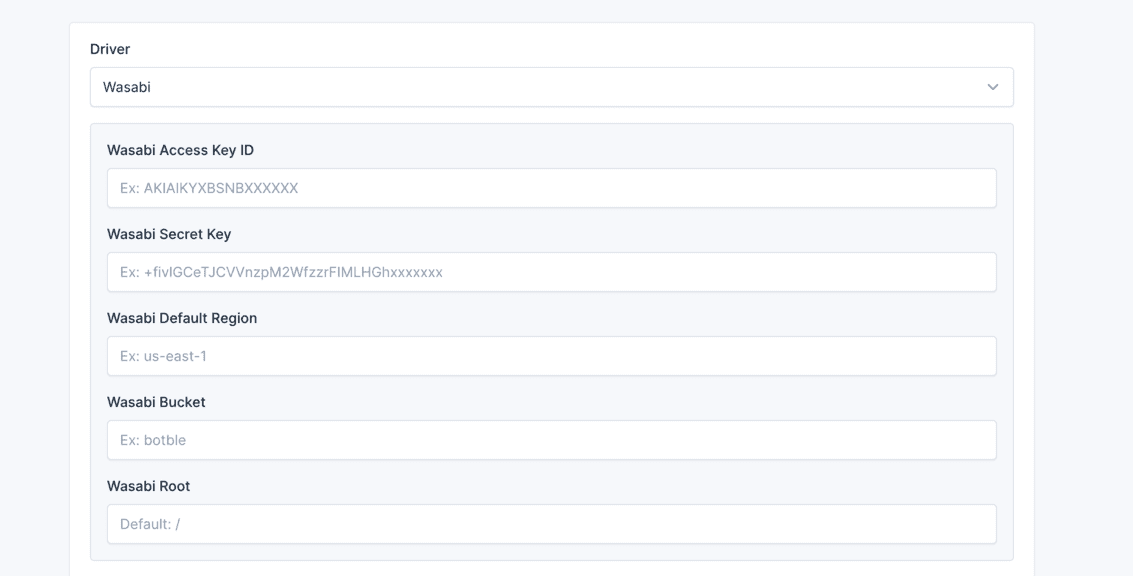
Setup Wasabi
In admin panel, go to Settings -> Media to configure Wasabi for storage.
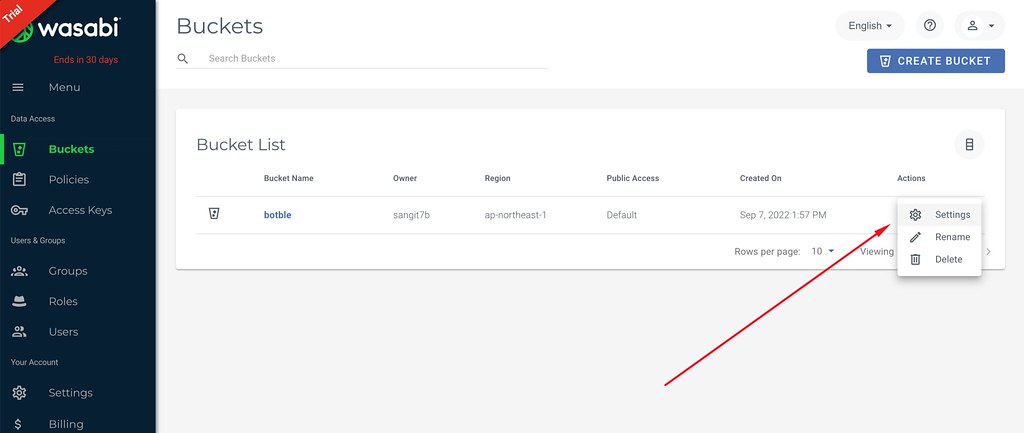
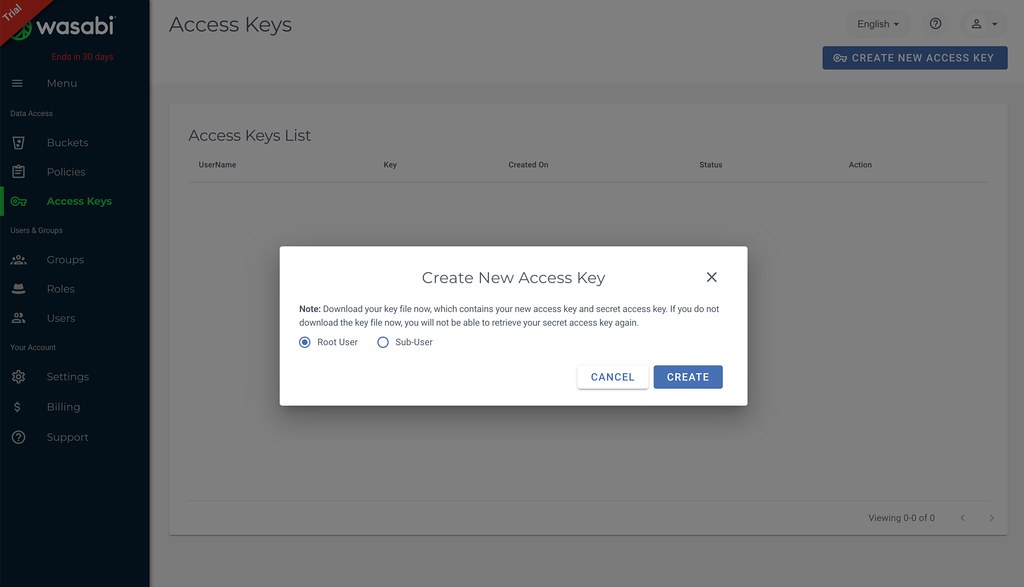
Steps
Create a new bucket in Wasabi:

Change your bucket to public:
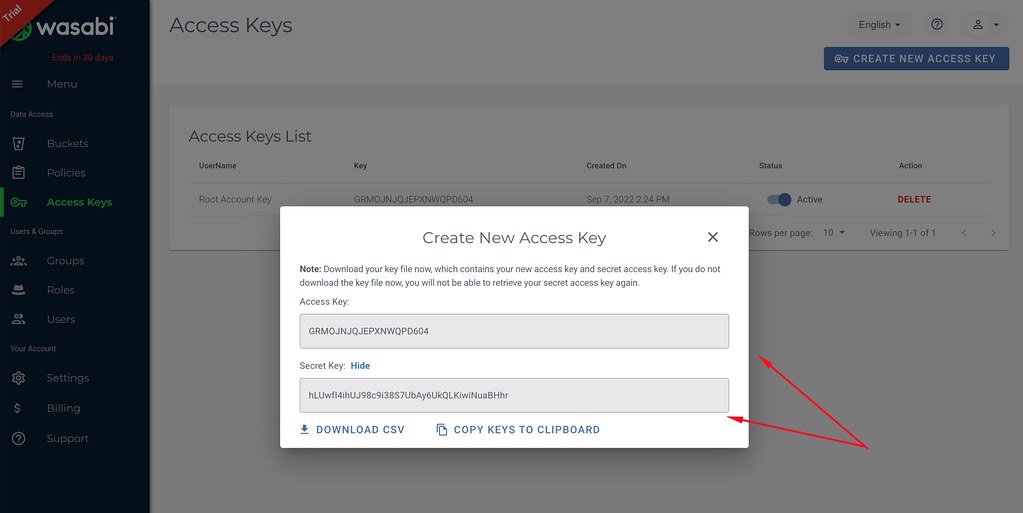
Get your access keys from Wasabi:
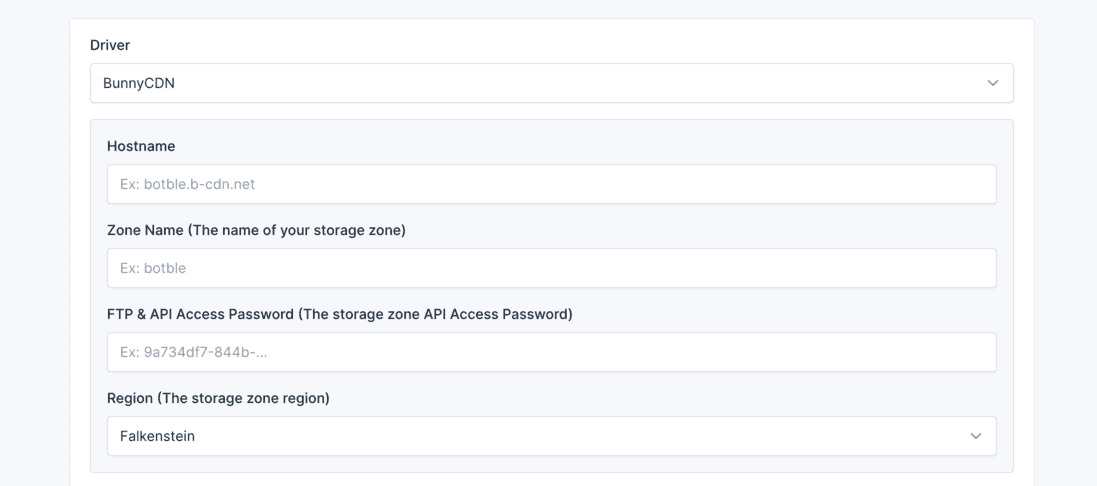
Setup BunnyCDN
In admin panel, go to Settings -> Media to configure BunnyCDN for storage.
Video Tutorial
Watch this video for a step-by-step guide:
Changing or Adding Image Sizes
When an image is uploaded, there will be an original image and thumbnails generated.
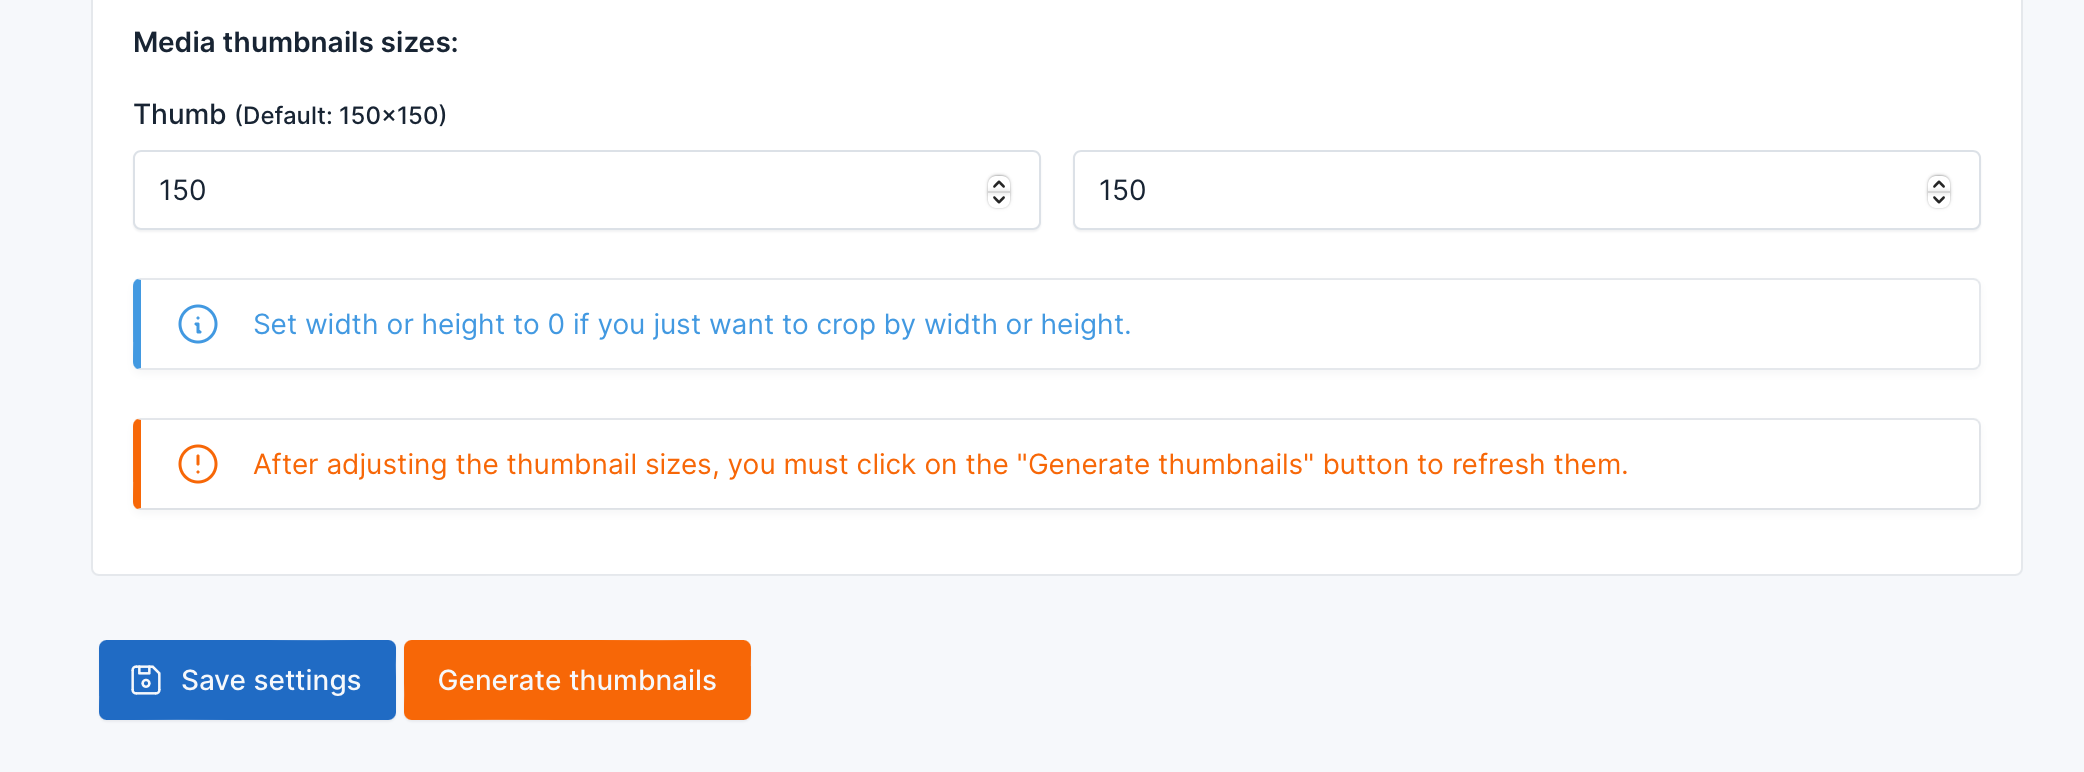
By default, there is a thumbnail named Thumb with a size of 150x150.
Resizing Existing Thumbnail
If you want to modify the size of this Thumb, navigate to Settings -> Media, then scroll down to Media thumbnails sizes
Adding New Sizes
In case you need to add new sizes for images, you need to manually add them to the .env file in the following format:
CLOUDIFY_MEDIA_SIZES=600x600,1280x900Each size will be separated by a comma ,. After adding this, revisit the Media settings page, and you will see the newly registered sizes appearing.
For example, adding two new sizes 600x600 and 1280x900. When a new image is uploaded, there will be four images generated: the original image, one default-sized image 150x150, and 2 images in the newly added sizes.
Changing File Extensions
By default, the media manager supports the following file extensions:
jpg,jpeg,png,gif,txt,docx,zip,mp3,bmp,csv,xls,xlsx,ppt,pptx,pdf,mp4,doc,mpga,wav,webpIf you want to add or remove any file extensions, you can override this configuration by adding CLOUDIFY_MEDIA_ALLOWED_EXTENSIONS to the .env file:
CLOUDIFY_MEDIA_ALLOWED_EXTENSIONS=jpg,jpeg,png,gif,txt,docx,zip,mp3,bmp,csv,xls,xlsx,ppt,pptx,pdf,mp4,doc,mpga,wav,webpIncreasing Maximum Upload Size
Most hosting providers have a maximum upload size ranging from 2MB to 20MB. Therefore, if you try to upload larger files, you may encounter some unexpected errors.
To increase the maximum upload size, you need to change the values of upload_max_filesize and post_max_size in the php.ini file:
upload_max_filesize = 10M
post_max_size = 10M
TIP
If you're unsure how to do this, you can contact your hosting/VPS provider for assistance.