Email
This guide will help you configure email sending for your website. Email is essential for features like contact forms, password resets, order notifications, and newsletters.
Accessing Email Settings
- Log in to your admin panel
- Go to Settings → Email
- Or visit directly:
your-domain.com/admin/settings/email

Choosing the Right Mailer
The system supports multiple email services. Here's a guide to help you choose:
| Mailer | Best For | Difficulty | Cost |
|---|---|---|---|
| SMTP | Most users, shared hosting | Easy | Depends on provider |
| Mailgun | High volume, better deliverability | Medium | Free tier available |
| SendGrid | Transactional emails, analytics | Easy | Free tier available |
| Amazon SES | Large scale, AWS users | Advanced | Pay per use |
| Postmark | Fast delivery, developers | Medium | Paid |
| Resend | Modern alternative, developers | Medium | Free tier available |
| Sendmail | Server-based (advanced) | Advanced | Free |
| Log | Testing only | Easy | Free |
Recommendation for Beginners
- Shared Hosting: Use your hosting provider's SMTP or Mailgun
- VPS/Dedicated Server: Mailgun or SendGrid for best deliverability
- Gmail Users: Use SMTP with Gmail (see configuration below)
Setting Up SMTP
SMTP is the most common method and works with most email providers.
General SMTP Settings
- Select SMTP as the Mailer
- Fill in the following fields:
- Host: Your email provider's SMTP server address
- Port: Usually 587 (TLS) or 465 (SSL)
- Username: Your email address or account username
- Password: Your email password or app password
- Encryption: TLS (recommended) or SSL
- Set the Sender Name and Sender Email
- Click Save Settings
- Use Send Test Email to verify
Common SMTP Ports
| Port | Encryption | Notes |
|---|---|---|
| 587 | TLS/STARTTLS | Recommended for most providers |
| 465 | SSL | Legacy SSL, still widely used |
| 25 | None | Often blocked by hosting providers |
| 2525 | TLS | Alternative when 587 is blocked |
Using Gmail
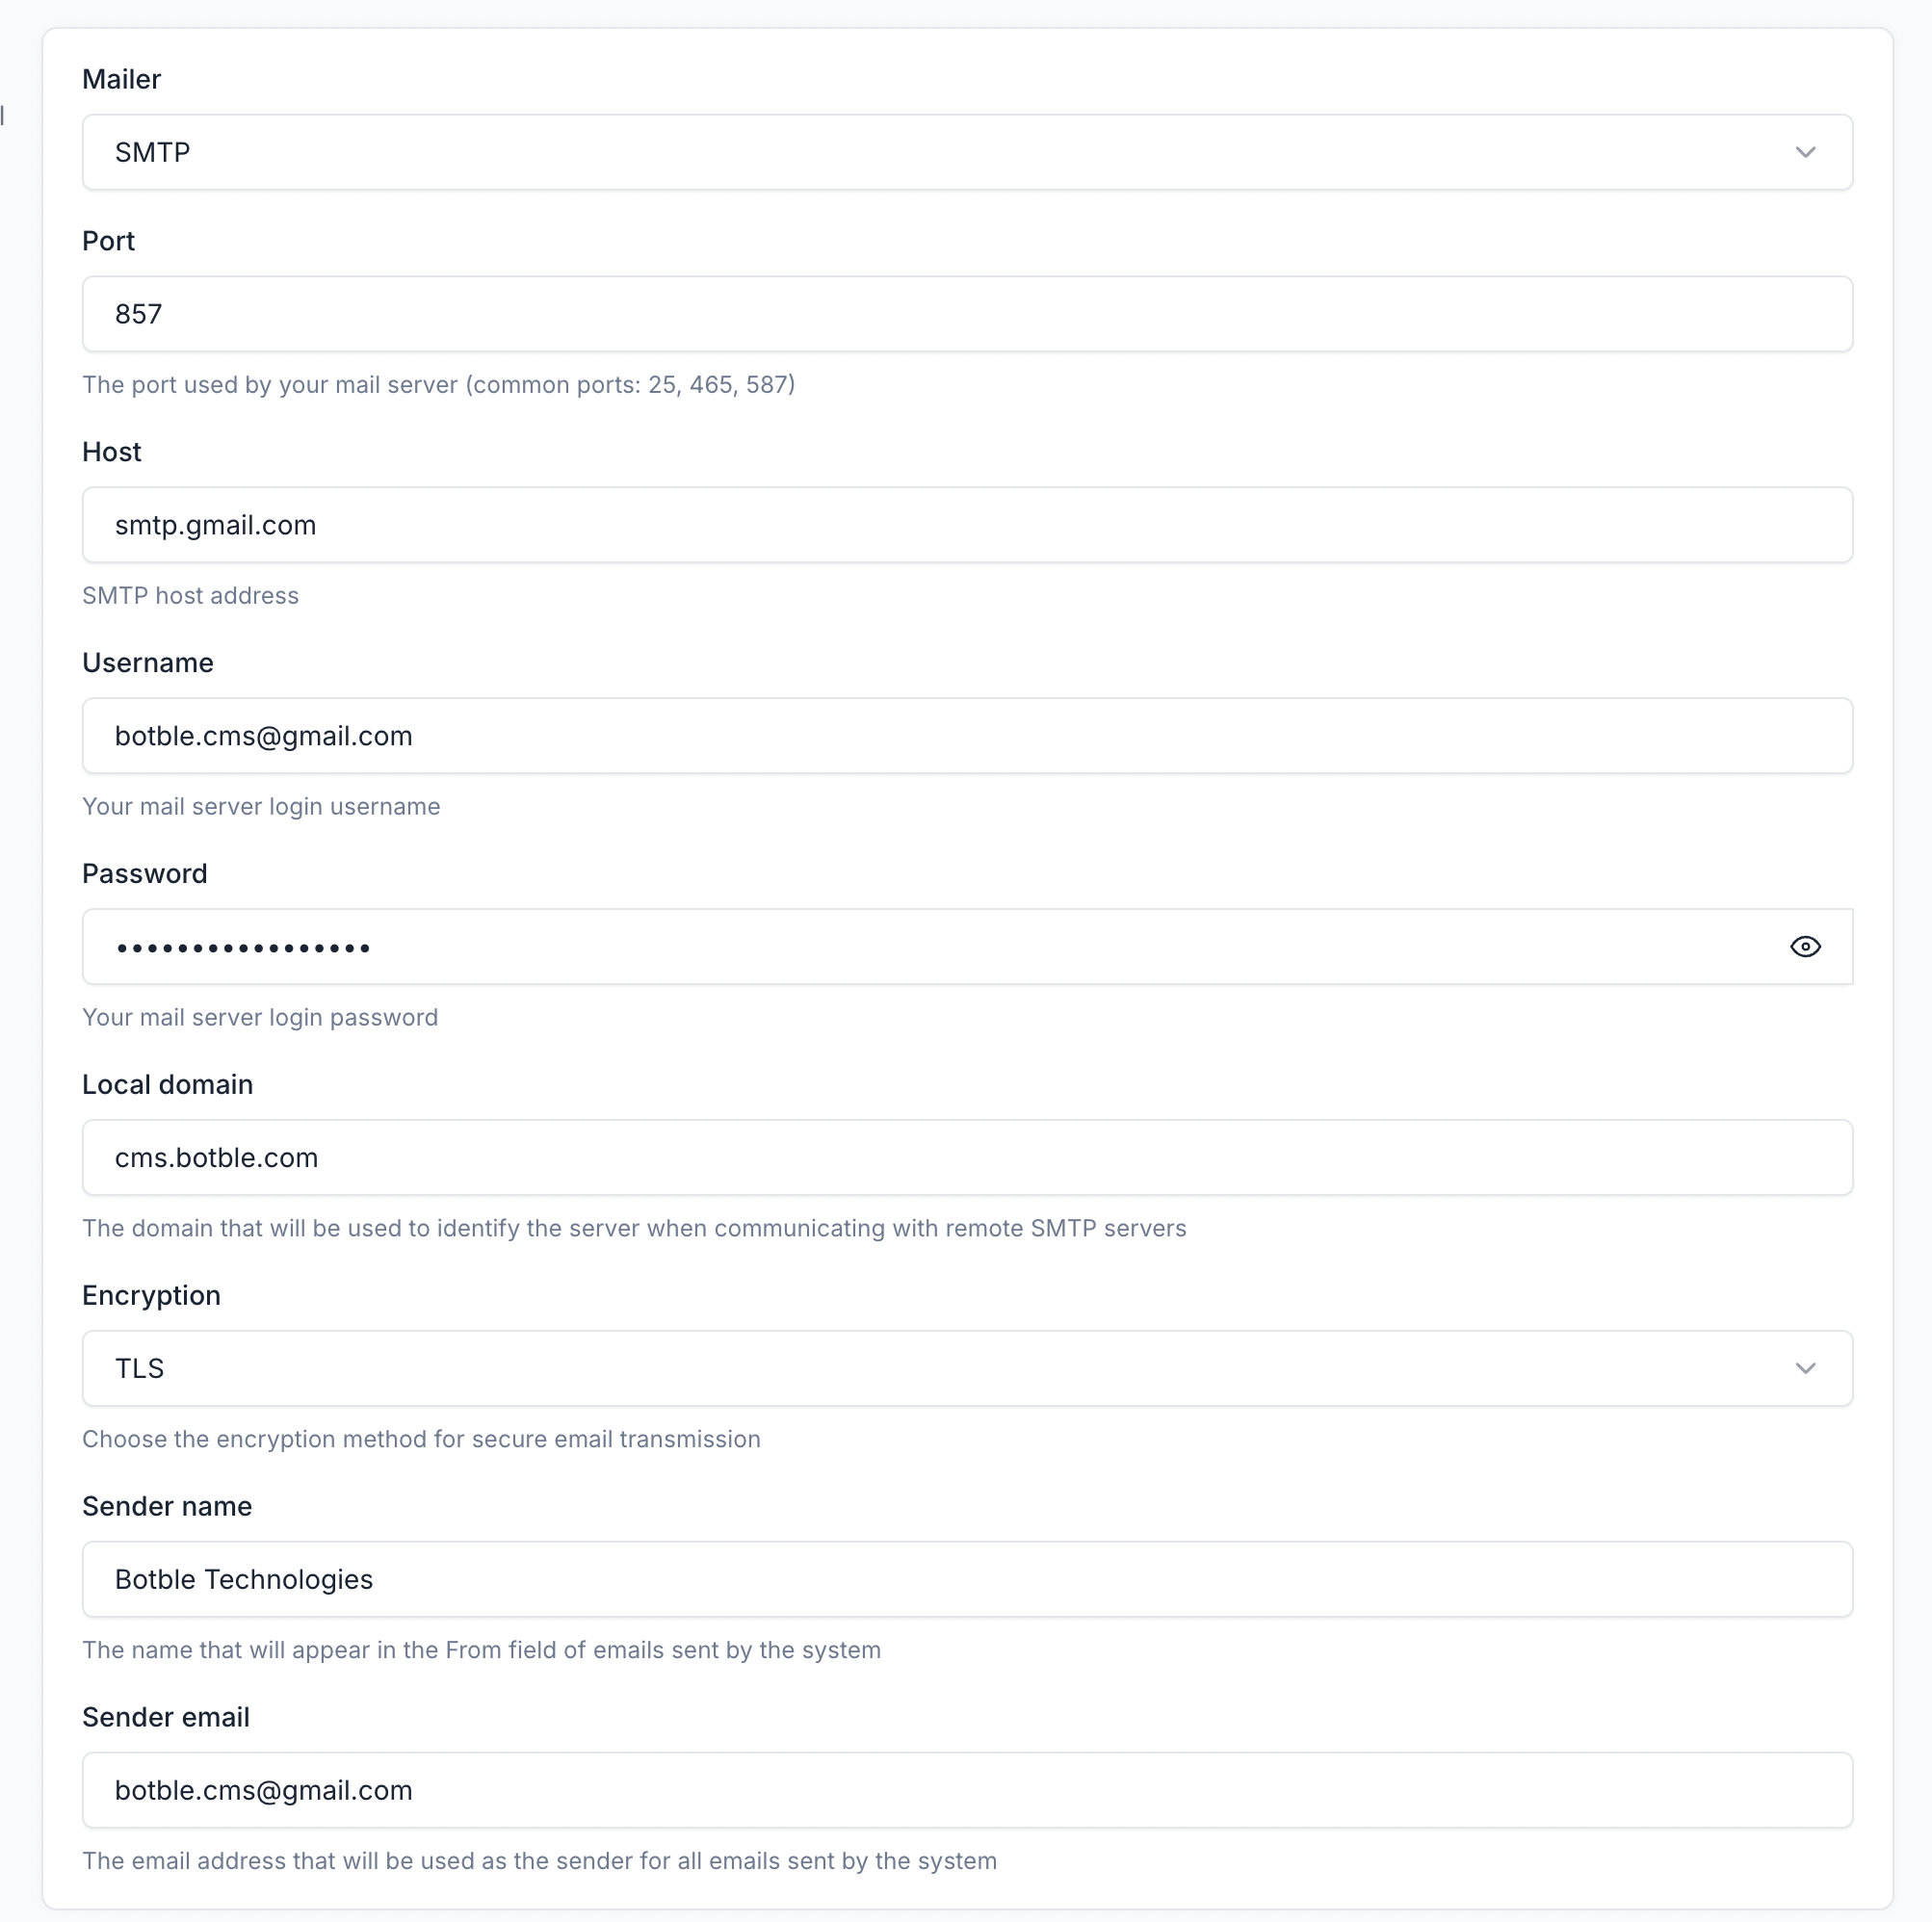
Configuration:
- Mailer: SMTP
- Host:
smtp.gmail.com - Port:
587 - Encryption: TLS
- Username:
[email protected] - Password: Use an App Password (not your regular password)
Important: Getting a Gmail App Password
- Go to Google Account Security
- Enable 2-Step Verification if not already enabled
- Go to App Passwords (search for it in your Google Account)
- Select "Mail" and "Other (Custom name)"
- Enter a name like "My Website"
- Click Generate and copy the 16-character password
- Use this password in your email settings
For more details: Google App Passwords Help
Using Outlook/Office 365
- Host:
smtp.office365.com - Port:
587 - Encryption: TLS
- Username: Your full email address
- Password: Your account password or app password
Using Yahoo Mail
- Host:
smtp.mail.yahoo.com - Port:
587or465 - Encryption: TLS or SSL
- Username: Your Yahoo email address
- Password: App password (generate from Yahoo Account Security)
Using Yandex
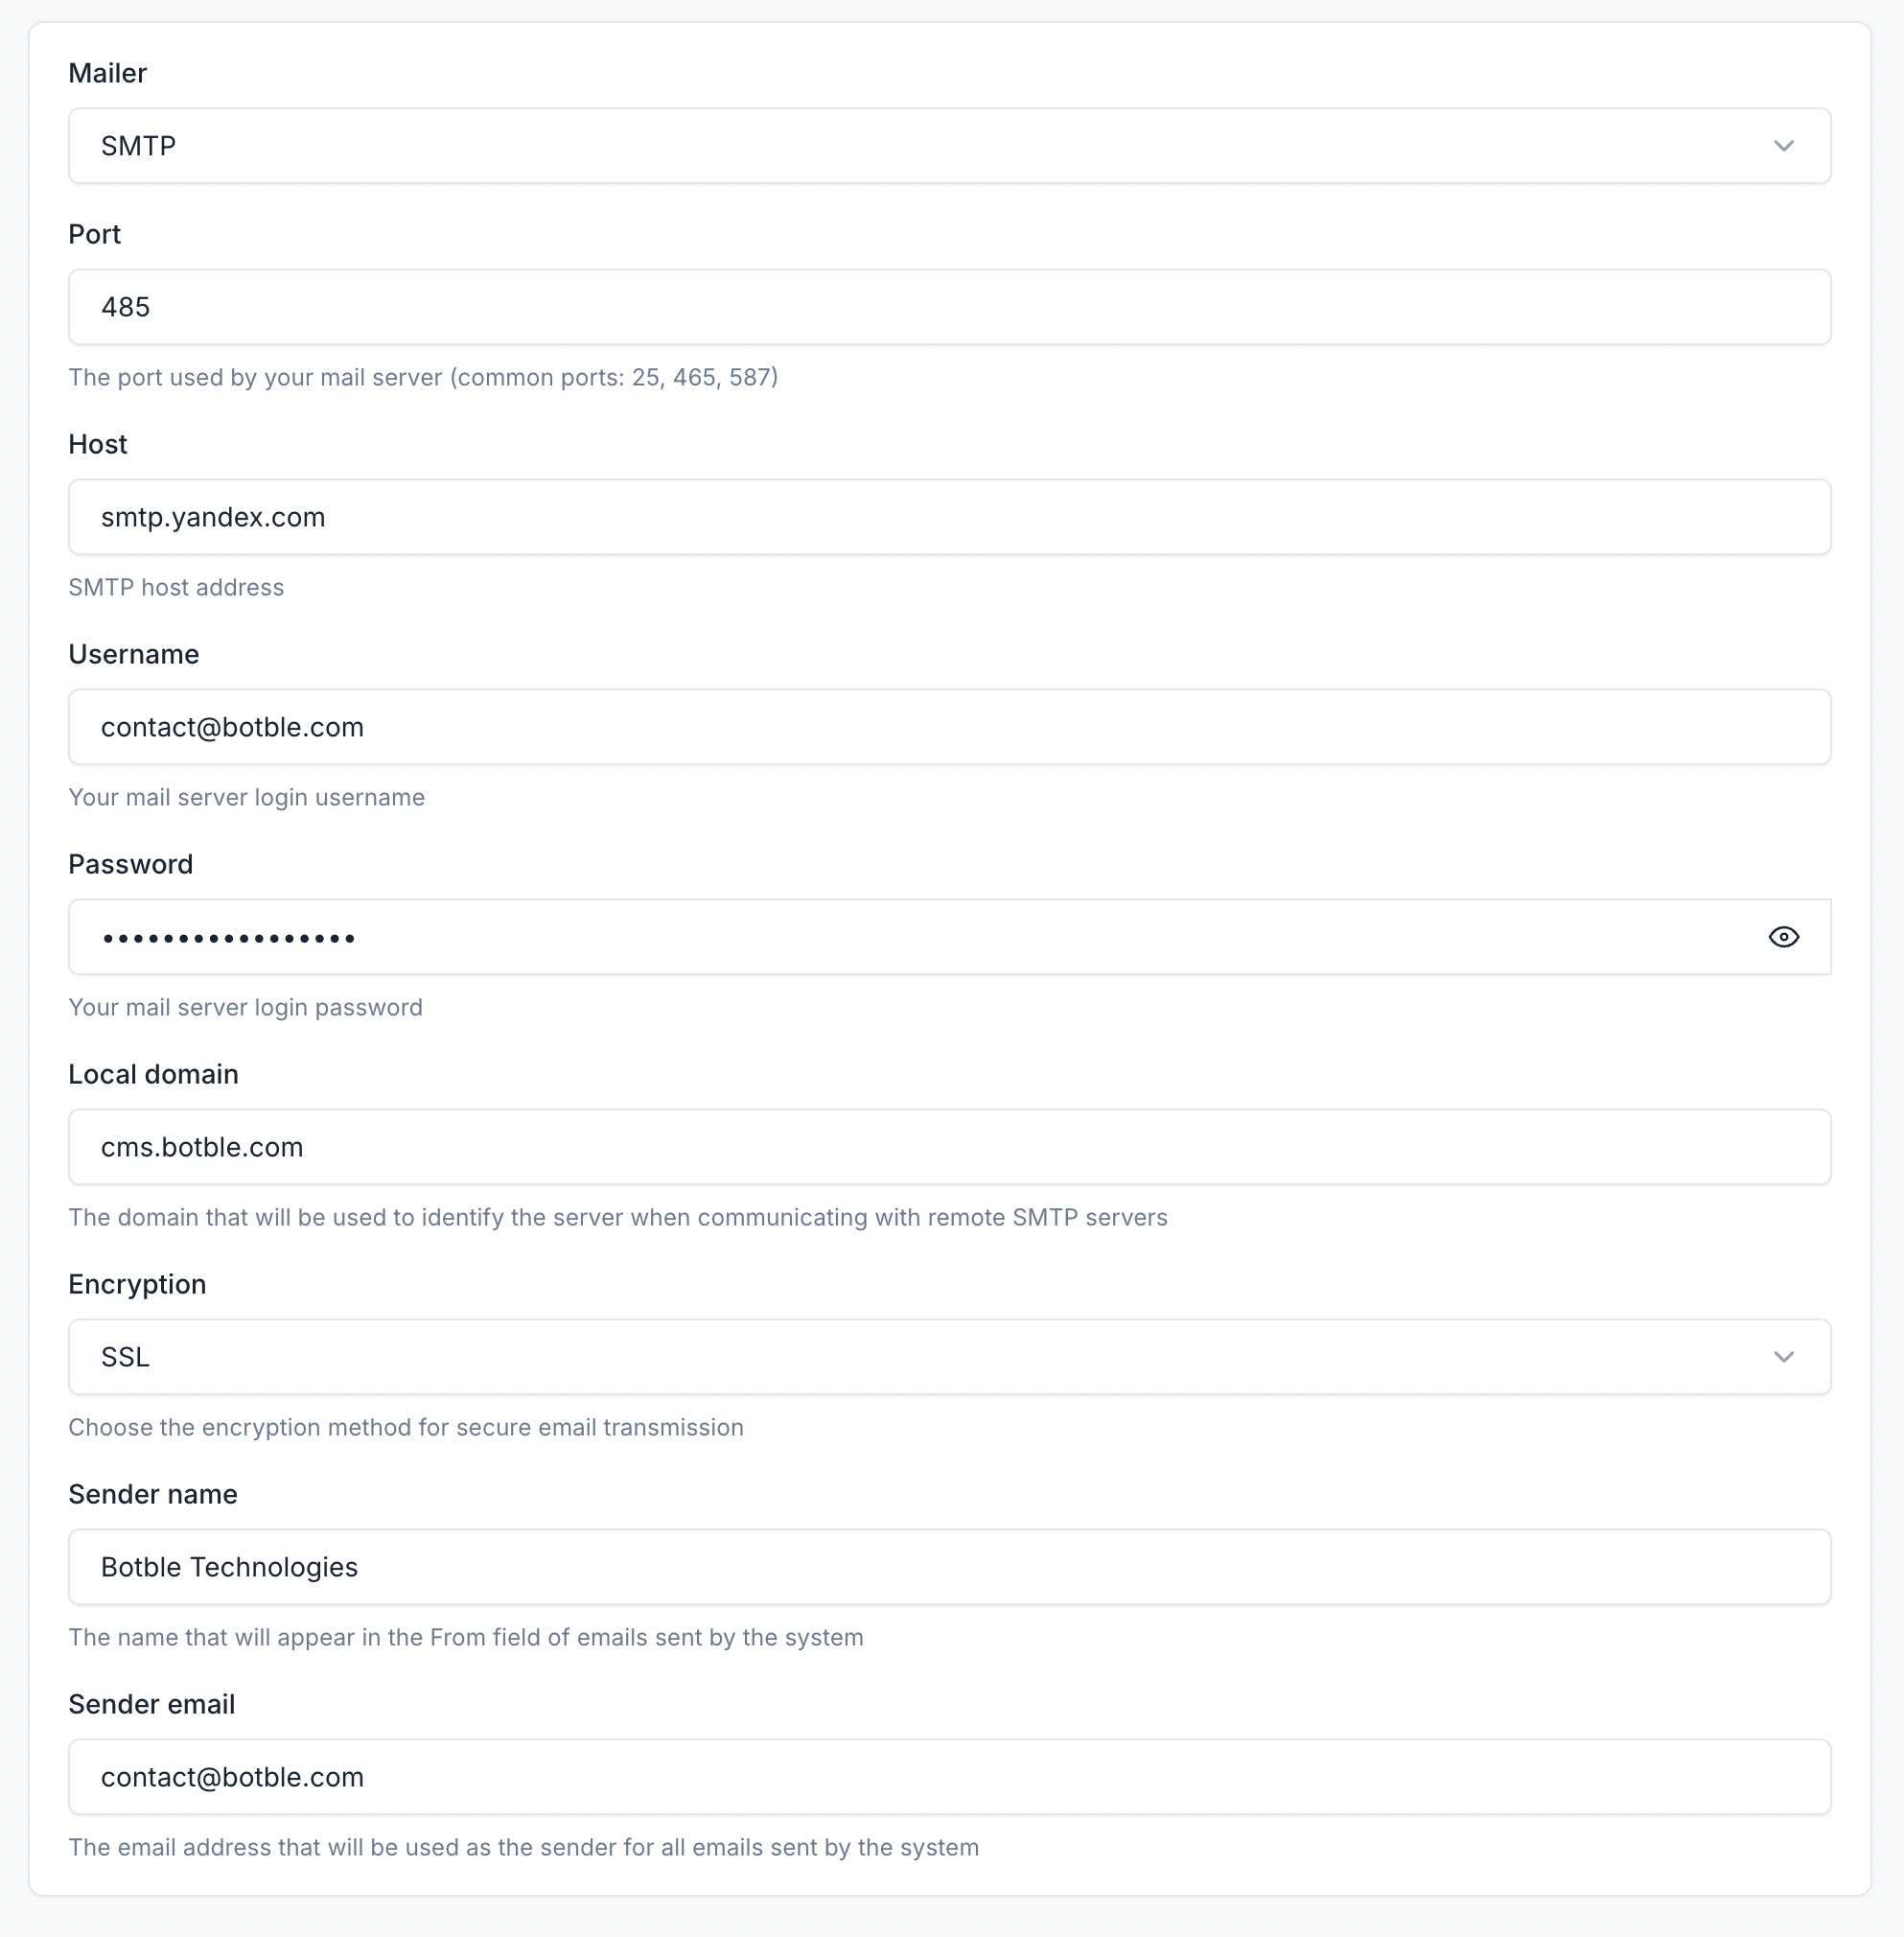
- Host:
smtp.yandex.com - Port:
465 - Encryption: SSL
- Username: Your Yandex email address
- Password: App password
Setting Up Mailgun
Mailgun is a professional email service with excellent deliverability. They offer a free tier for low-volume sending.
Steps:
- Create a Mailgun account
- Add and verify your domain in Mailgun
- Get your API credentials from the Mailgun dashboard
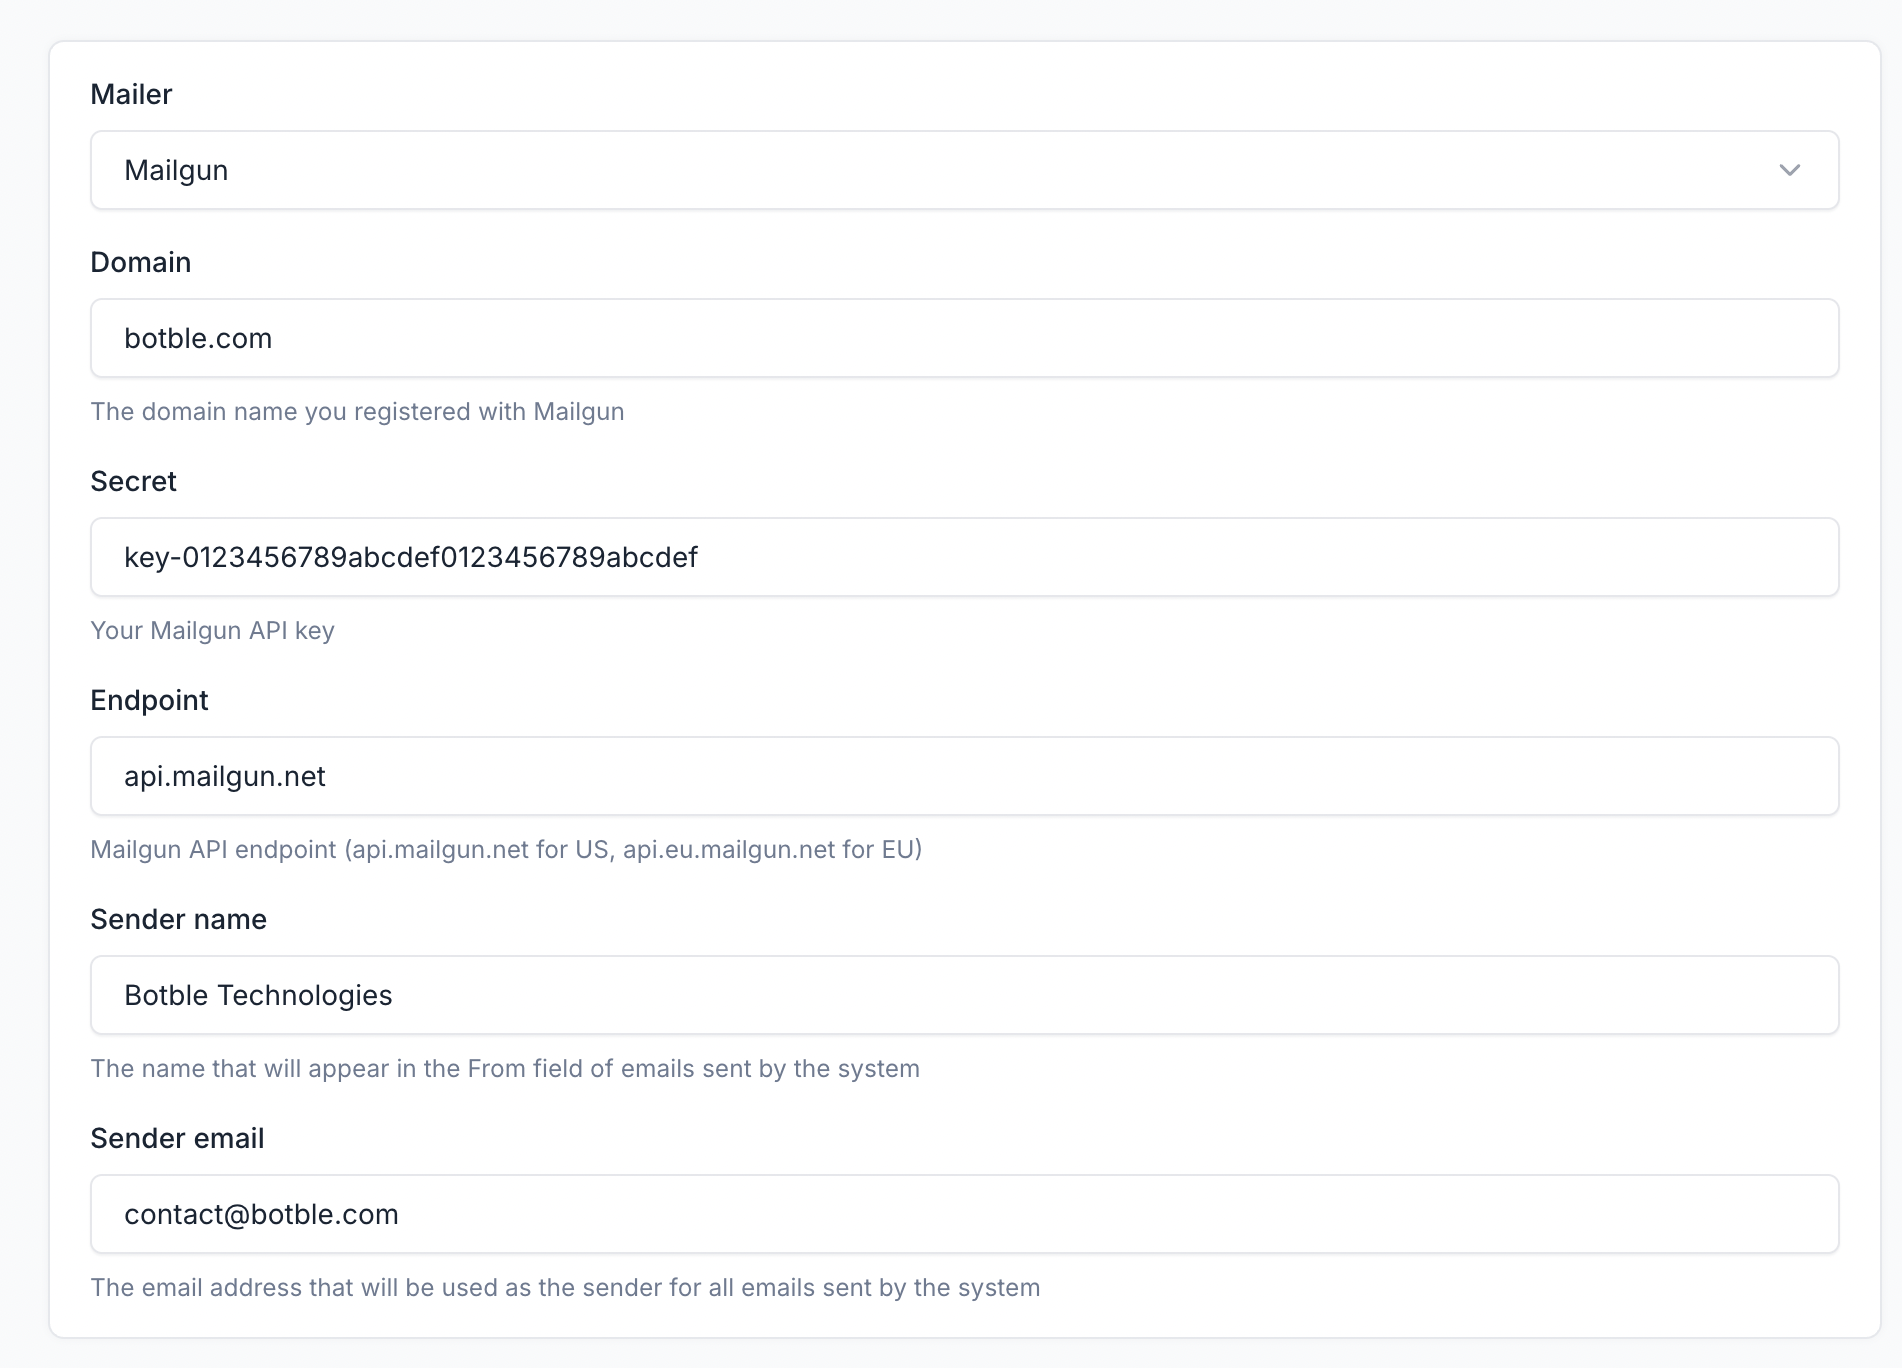
- In your email settings:
- Mailer: Mailgun
- Domain: Your verified Mailgun domain
- Secret: Your API key (must start with
key-) - Endpoint:
api.mailgun.net(US) orapi.eu.mailgun.net(EU)
Note: The secret key must have the prefix key-. Example: key-xxxxx
Setting Up SendGrid
SendGrid is a popular email service with excellent deliverability and analytics features.
Using SendGrid API (Recommended)
The system natively supports the SendGrid Web API, which is faster and more reliable than SMTP.
- Select SendGrid as the Mailer
- Enter your API Key
- Get it from the SendGrid Dashboard
- Create a key with Mail Send permissions
- Set your Sender Name and Sender Email
- Click Save Settings
Note: Your sender email must be from a verified domain or single sender in SendGrid. See SendGrid Sender Verification.
Using SendGrid via SMTP (Alternative)
If you prefer SMTP over the API:
- Mailer: SMTP
- Host:
smtp.sendgrid.net - Port:
587 - Encryption: TLS
- Username: Must be exactly
apikey - Password: Your SendGrid API Key
Setting Up Amazon SES
Amazon Simple Email Service (SES) is ideal for high-volume sending at low cost.
- Select SES as the Mailer
- Enter your AWS credentials:
- Key: Your AWS Access Key ID
- Secret: Your AWS Secret Access Key
- Region: Your SES region (e.g.,
us-east-1,eu-west-1)
Prerequisites:
- AWS account with SES enabled
- Verified domain or email addresses in SES
- SES moved out of sandbox mode for production use
Setting Up Postmark
- Select Postmark as the Mailer
- Enter your Postmark Server Token
- Find this in your Postmark server settings under "API Tokens"
Setting Up Resend
Resend is a modern email API service with a clean interface.
- Select Resend as the Mailer
- Enter your API Key
- Get it from the Resend Dashboard
Sender Information
Regardless of which mailer you choose, always configure:
- Sender Name: The name that appears in recipients' inbox (e.g., "My Website")
- Sender Email: The email address that appears as the sender
Tip: Use an email address from your own domain for better deliverability.
Testing Your Configuration
Always test before saving!
- Configure all settings
- Click Save Settings
- Click Send Test Email
- Enter your email address
- Check your inbox (and spam folder)
If the test email arrives, your configuration is working correctly.
Common Issues and Solutions
SMTP Blocked by Hosting Provider
Problem: Many shared hosting providers block outgoing SMTP connections on ports 25, 465, and 587 to prevent spam.
Important
Make sure that your hosting provider doesn't block SMTP ports. If SMTP port is blocked, you need to send mail using an API service such as Mailgun, SendGrid, or Amazon SES. These services use HTTPS instead of SMTP, bypassing port restrictions.
Solutions:
- Use your host's mail server: Most hosting providers offer their own SMTP server. Contact support for details.
- Use port 2525: Some providers allow this alternative port.
- Use an API-based service: Switch to Mailgun, SendGrid, or Resend which use HTTPS instead of SMTP.
- Contact your hosting provider: Request SMTP to be unblocked for your account.
Emails Going to Spam
Note
We cannot control whether emails go to the main inbox or spam/junk folder. This depends on many factors including your IP address, hosting provider, sender reputation, and recipient's email settings.

Why emails go to spam:
- Poor sender reputation (IP address blacklisted)
- Missing or incorrect SPF, DKIM, DMARC records
- Using shared hosting with bad IP reputation
- Content triggers spam filters
- Recipient marked similar emails as spam
Solutions:
- Use a professional email service: Switch to Mailgun, SendGrid, or Amazon SES for better deliverability and sender reputation.
- Set up SPF, DKIM, and DMARC records: These DNS records verify your email authenticity.
- Verify sender domain: Make sure your sender email matches your domain.
- Avoid spam trigger words: Don't use excessive caps, exclamation marks, or spammy phrases.
- Warm up your sending IP: Start with low volume and gradually increase.
For more tips on improving email deliverability, see: Mailgun - How to Stop Emails Going to Spam
"Connection Timed Out" Error
Causes:
- Firewall blocking outgoing connections
- Wrong port or host
- ISP/hosting blocking SMTP
Solutions:
- Verify the host and port are correct
- Try different ports (587, 465, 2525)
- Contact your hosting provider
- Switch to an API-based mailer (Mailgun, SendGrid)
"Authentication Failed" Error
Causes:
- Wrong username or password
- Account requires app password
- Less secure apps disabled (Gmail)
Solutions:
- Double-check username and password
- For Gmail: Use an App Password instead of regular password
- For other providers: Check if 2FA requires an app password
- Verify your email account is not locked or suspended
Error Code 535 (WHM/cPanel SMTP Restriction)
Problem: You receive an error like "Expected response code 235 but got code 535" when trying to send emails from a cPanel/WHM hosted server.
Cause: WHM has SMTP Restrictions enabled that block outgoing SMTP authentication from your account.
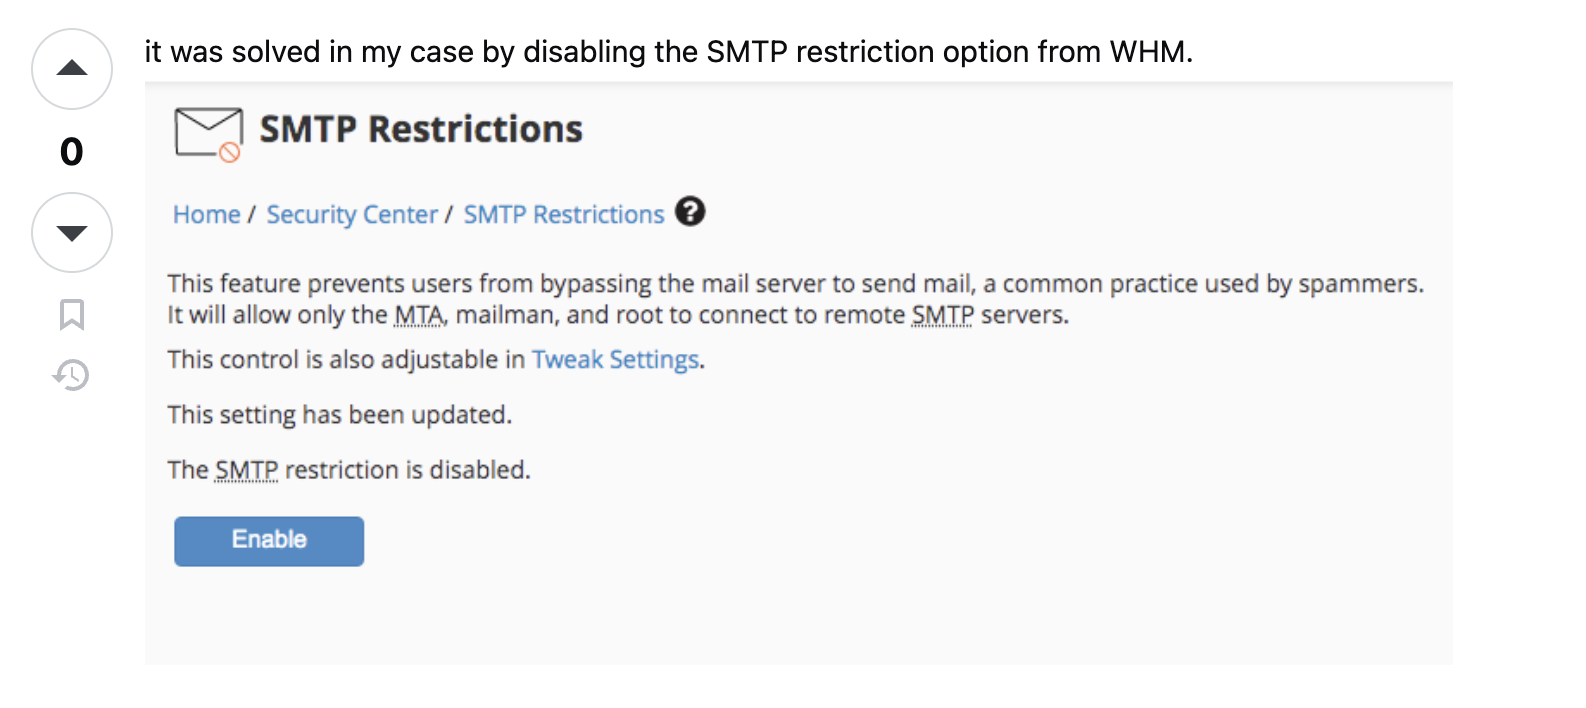
Solution:
- Log in to WHM (Web Host Manager) as root
- Go to Server Configuration → SMTP Restrictions
- Either:
- Disable SMTP Restrictions entirely, or
- Add your account to the whitelist to allow SMTP access
- Save changes and try sending email again
Note: If you don't have WHM access, contact your hosting provider and ask them to:
- Disable SMTP restrictions for your account, or
- Whitelist your cPanel account for SMTP access
This is a common restriction on shared hosting to prevent spam abuse.
For more details, see: Stack Overflow - Expected response code 235 but got code 535
Emails Not Sending (No Error)
Possible causes:
- Queue not running: If you see a warning about queue configuration, emails are queued but not processed.
- Wrong sender email: Some providers reject emails from unverified sender addresses.
Solutions:
- Set up a queue worker if using queues (ask your developer)
- Verify your sender email address with your email provider
- Check the Laravel log files for errors
SSL Certificate Errors
Solutions:
- Try switching between TLS and SSL encryption
- If using port 465, use SSL; if using 587, use TLS
- Try setting encryption to "None" temporarily to test (not recommended for production)
Email Templates
You can customize the content and appearance of system emails.
Editing Templates
- Go to Settings → Email
- Scroll down to see available email templates
- Click on a template to edit it

Using Variables
Templates support dynamic variables that are replaced with actual data when emails are sent.
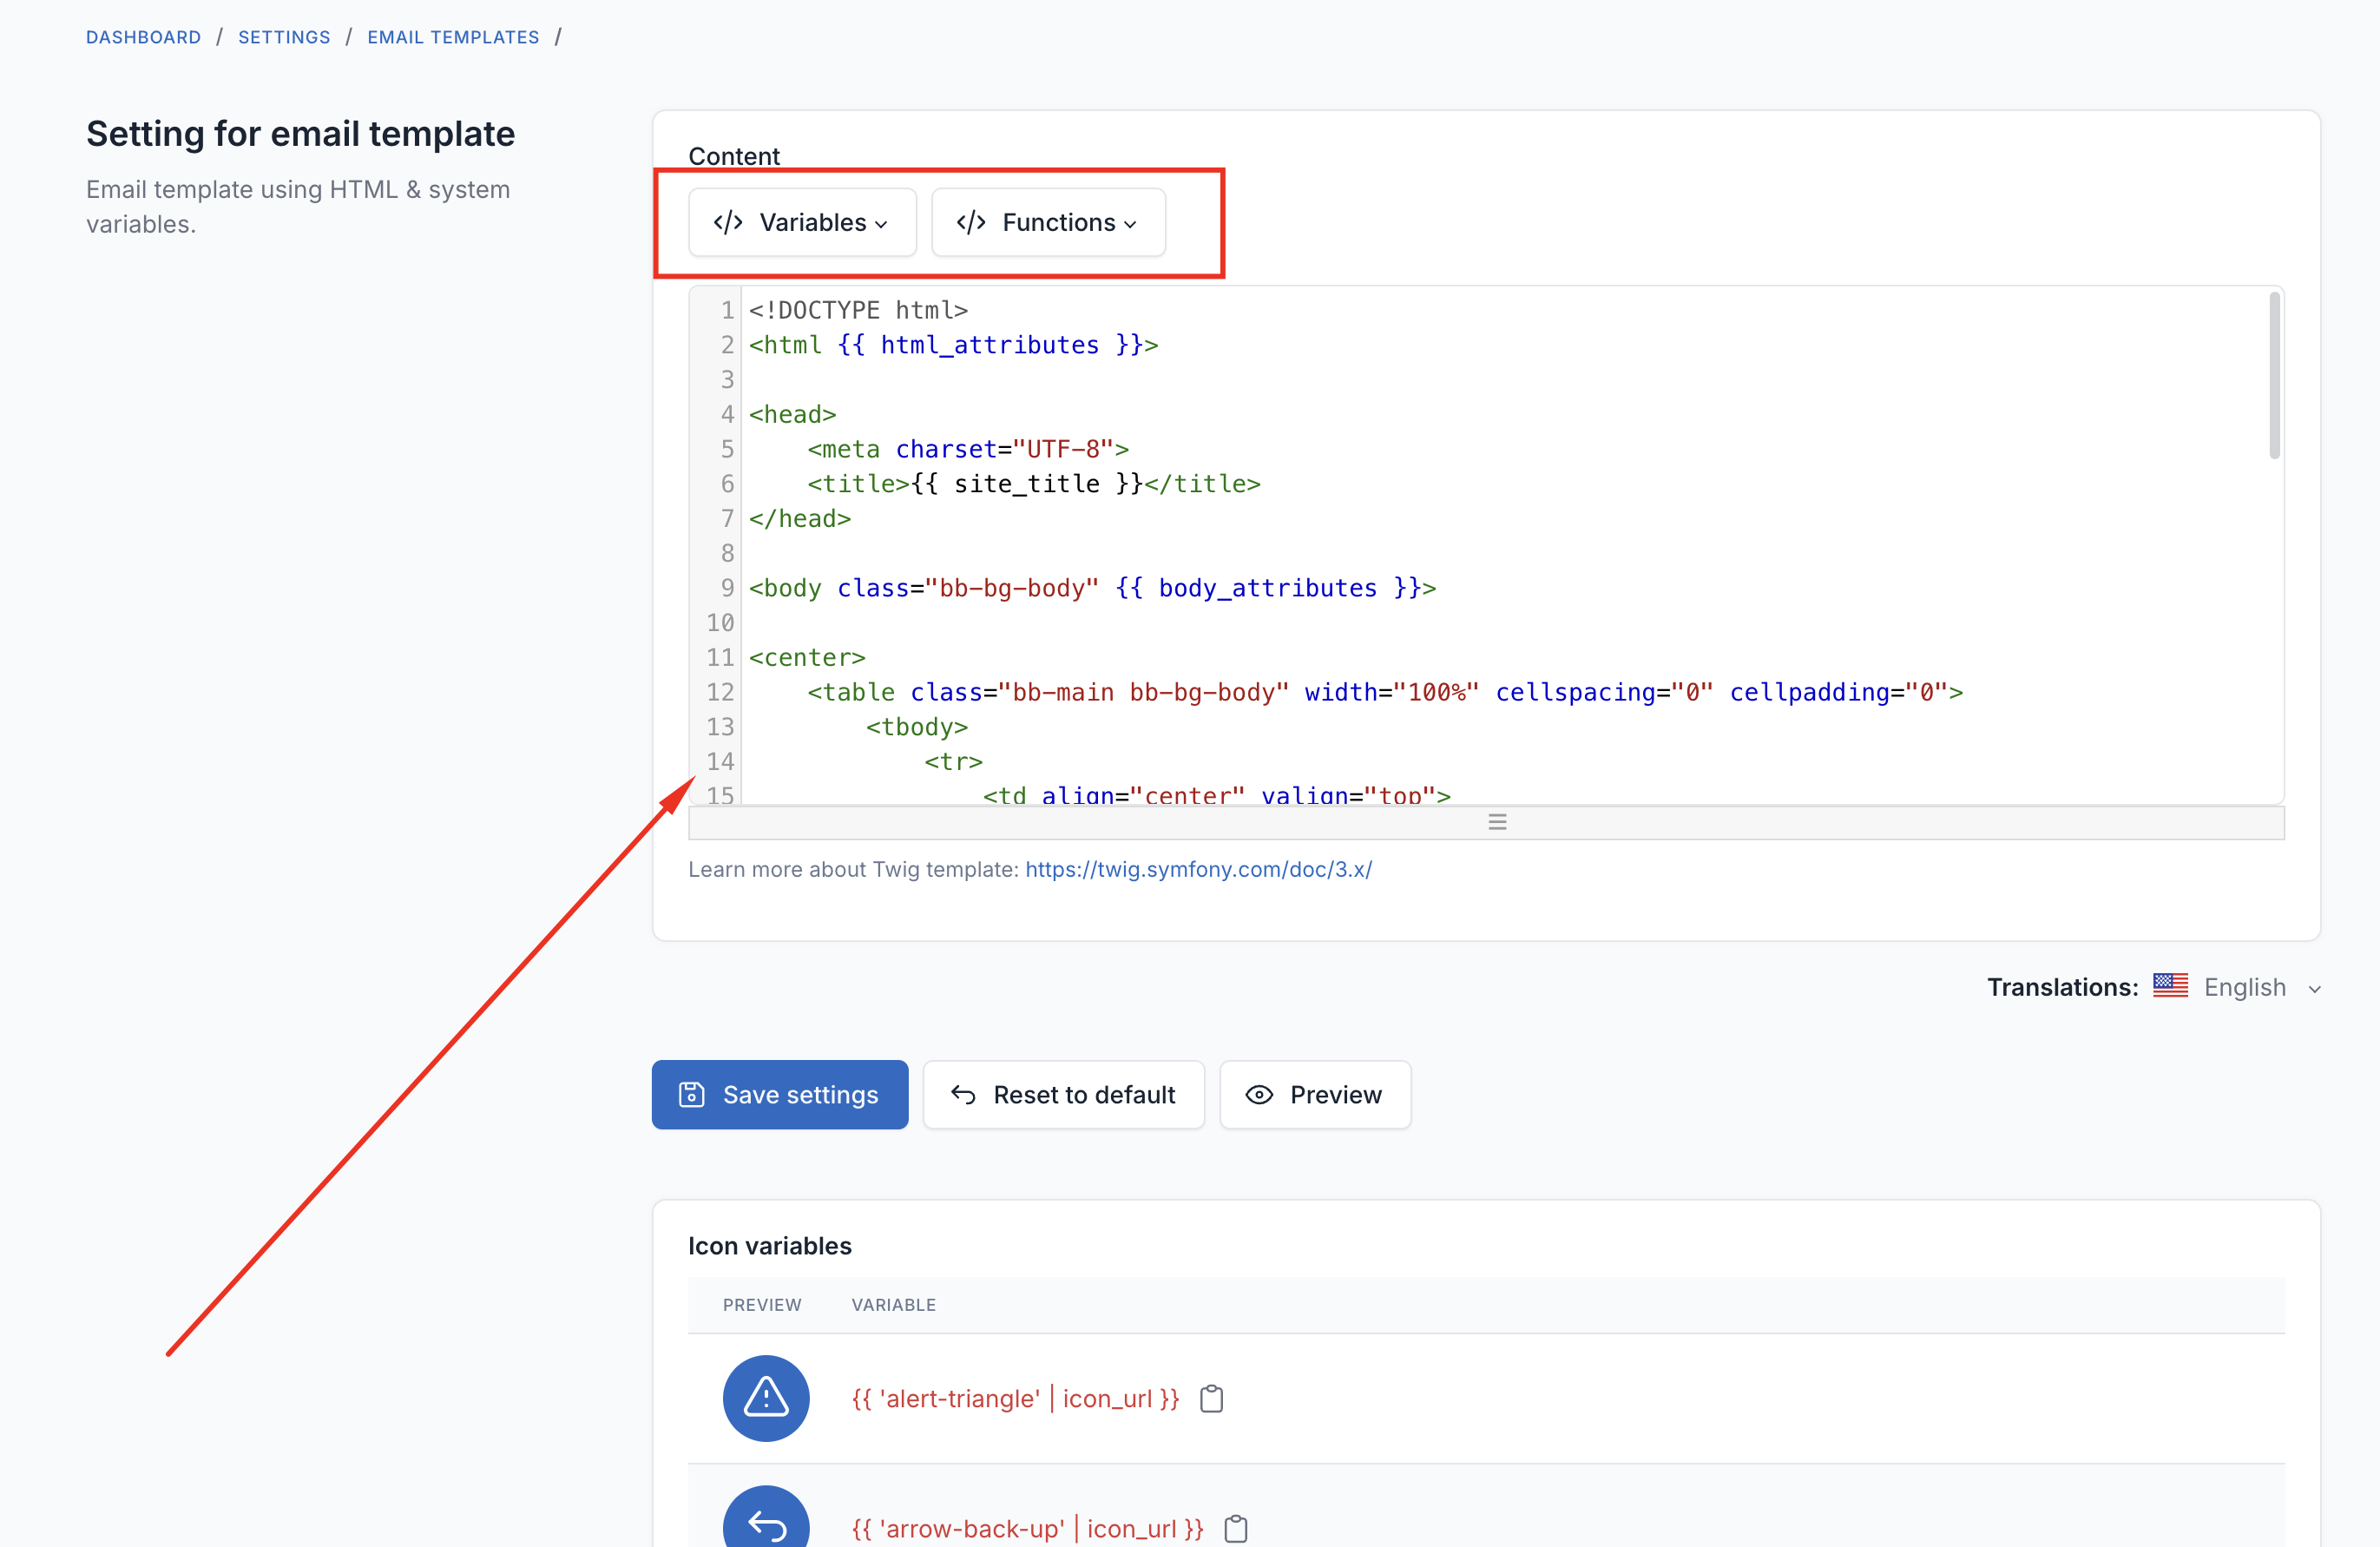
Click the Variables dropdown to see available placeholders for each template. Common variables include:
- Your website name- Your website URL- Current date and time
Enabling/Disabling Templates
Each email template can be turned on or off individually. If you don't want certain notification emails to be sent, simply toggle them off.
Best Practices
- Use a professional email service for business websites (Mailgun, SendGrid, Amazon SES)
- Test thoroughly before going live
- Monitor your sender reputation through your email service dashboard
- Set up DNS records (SPF, DKIM, DMARC) for better deliverability
- Don't use free email addresses (gmail.com, yahoo.com) as your sender email for professional sites
- Keep your API keys secure and never share them publicly
Getting Help
If you're still having trouble:
- Check the error messages carefully
- Review your hosting provider's documentation
- Contact your email service provider's support
- Ask your web developer or system administrator