Translation
Introduction
Botble CMS provides a comprehensive translation system that allows you to create multilingual websites. The translation functionality is built on top of Laravel's localization features and extended with additional capabilities specific to Botble CMS.
Adding a new Language
For detailed instructions on adding a new language, please refer to the Multi Language documentation.
Translation Management
Botble CMS provides several ways to manage translations:
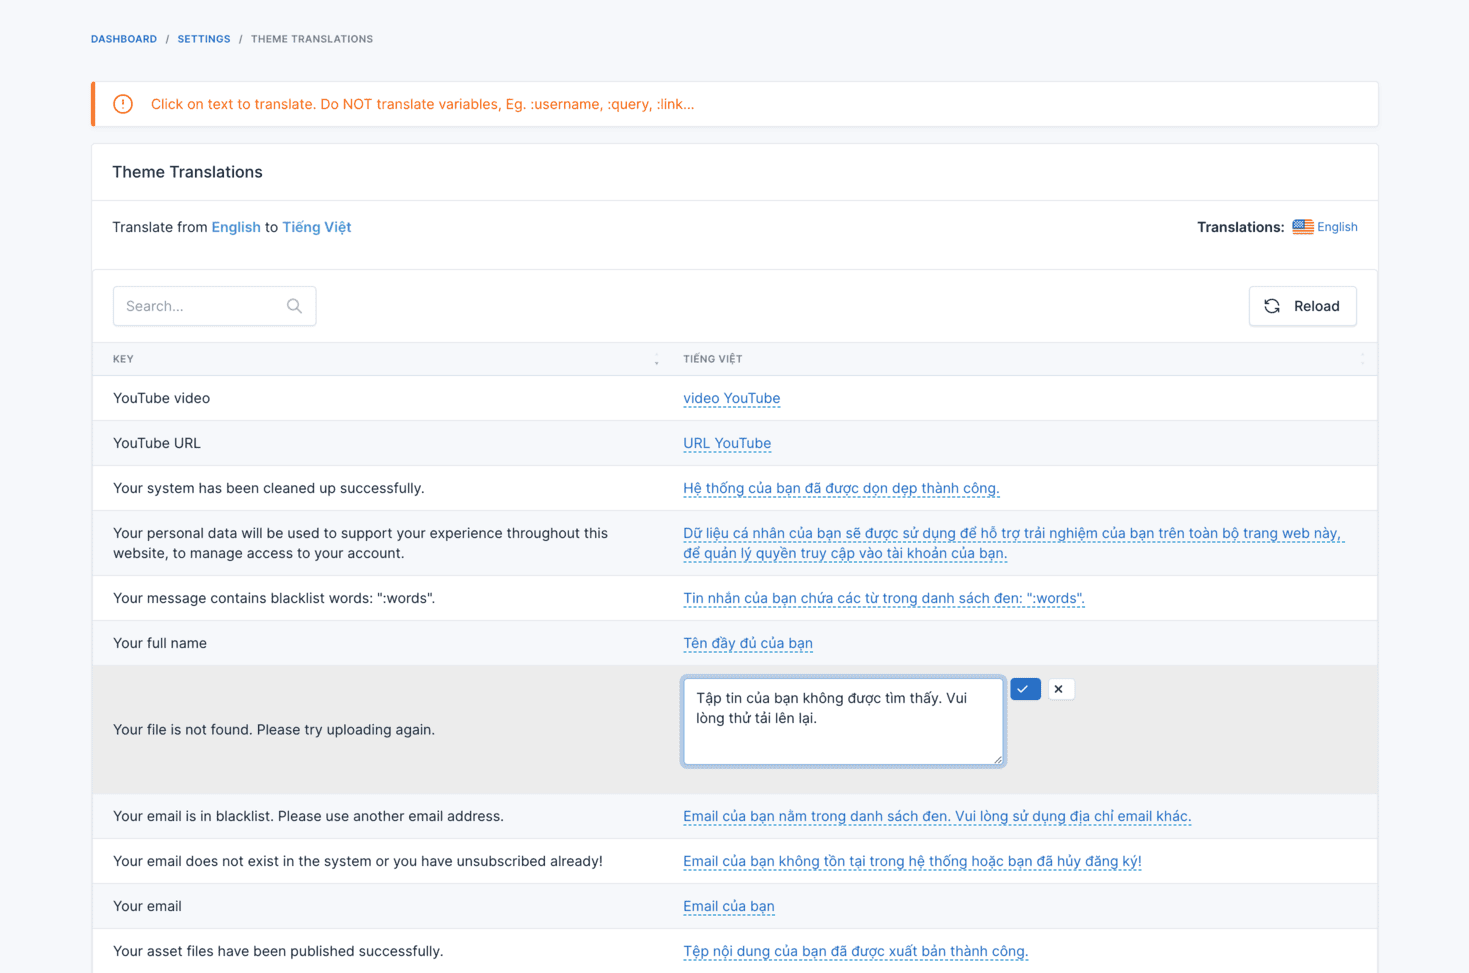
Translating the Theme
To translate theme-specific text:
- Go to Admin → Settings → Theme translations
- Select your language from the list on the right side
- Enter translations for each text string
- Click Save Changes
Translating Other Elements
To translate admin panel and plugin text:
- Go to Admin → Settings → Other translations
- Select your language from the list on the right side
- Enter translations for each text string
- Click Save Changes
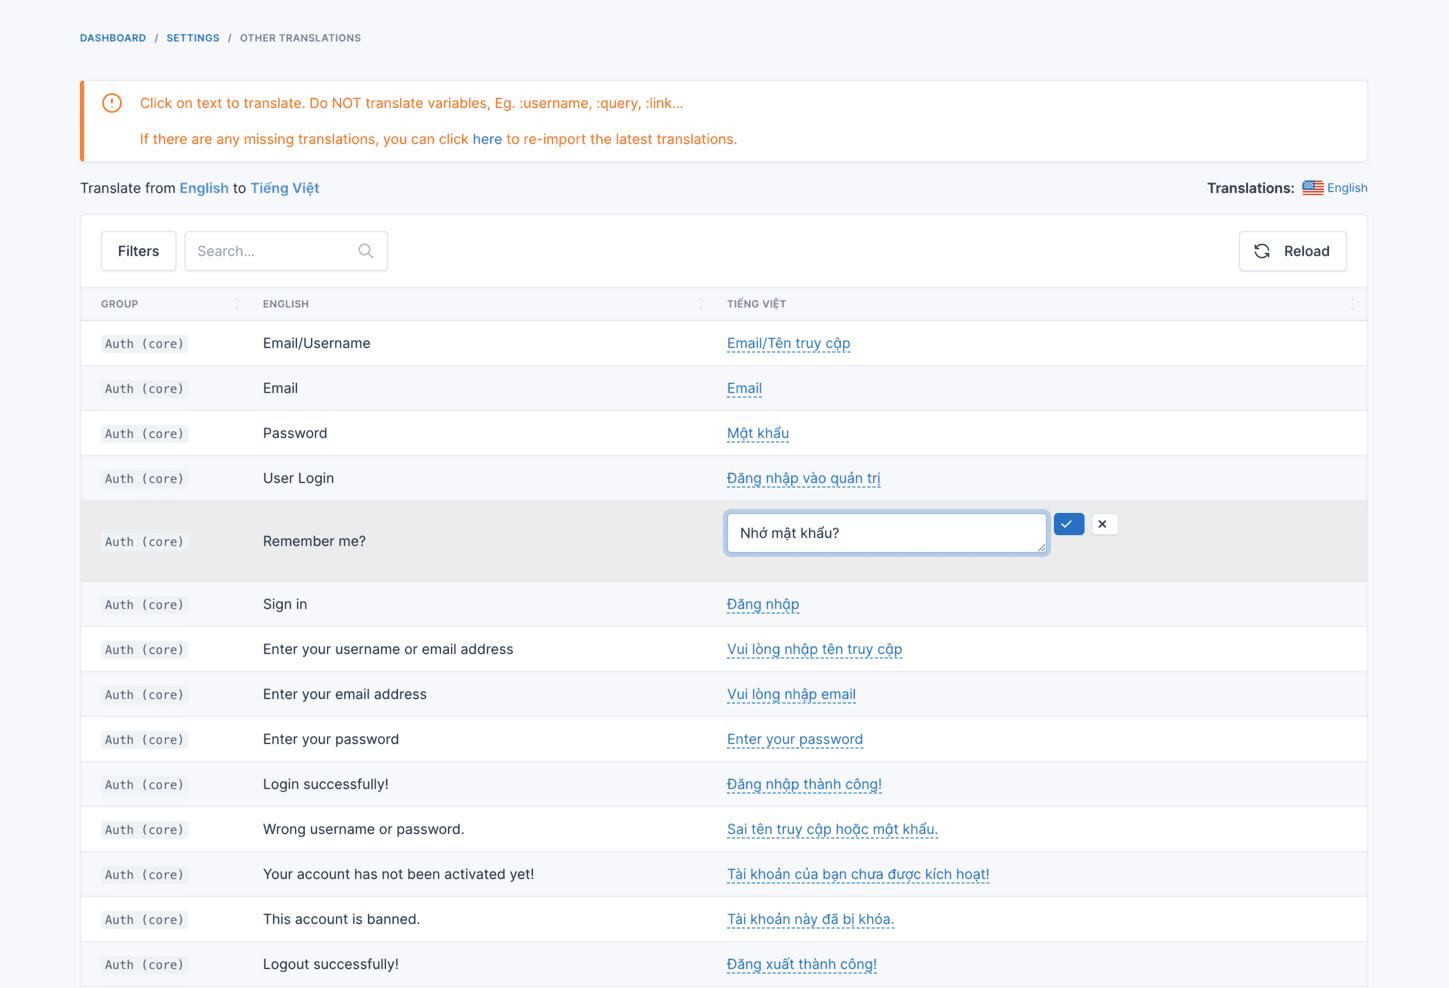
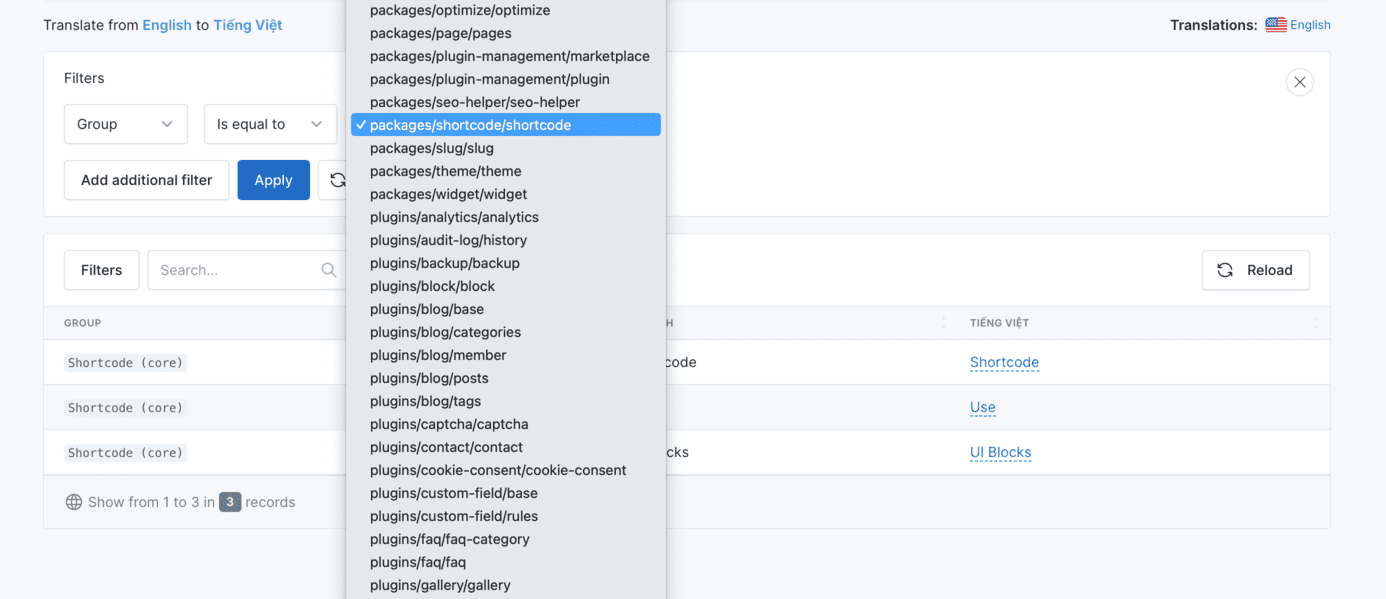
You can filter the translations by group to make it easier to find specific text:
Auto-Translation Features
Botble CMS includes powerful auto-translation capabilities that use Google Translate to automatically translate your website content.
Auto-Translate Theme
To automatically translate your theme to a new language:
php artisan cms:translation:auto-translate-theme <locale>For example, to translate your theme to Spanish:
php artisan cms:translation:auto-translate-theme esTo force re-translation of already translated strings, use the --override or -o option:
php artisan cms:translation:auto-translate-theme es --overrideAuto-Translate Core
To automatically translate the core and plugin text to a new language:
php artisan cms:translation:auto-translate-core <locale>For example, to translate the core to French:
php artisan cms:translation:auto-translate-core frTo force re-translation of already translated strings, use the --override or -o option:
php artisan cms:translation:auto-translate-core fr --overrideManaging Translations
Downloading Locales
You can download translation files for a specific locale:
php artisan cms:translation:download <locale>This command downloads the latest translation files for the specified locale from the Botble repository.
Removing Locales
To remove a locale and all its translation files:
php artisan cms:translation:remove <locale>Updating Theme Translations
To scan your theme for new translatable strings and add them to the translation system:
php artisan cms:translations:update-theme-translationsRemoving Unused Translations
To clean up unused translation strings:
php artisan cms:translations:remove-unused-translationsImport and Export Translations
Botble CMS provides tools to import and export translations for backup or migration purposes.
Exporting Translations
- Go to Admin → Tools → Data Synchronize → Export
- Select either "Theme translations" or "Other translations"
- Choose the language you want to export
- Click Export
Importing Translations
- Go to Admin → Tools → Data Synchronize → Import
- Select either "Theme translations" or "Other translations"
- Upload the previously exported translation file
- Click Import
Developer Information
Translation in Themes
Theme translations use JSON files located in the theme's lang directory. For example, to add Spanish translations to your theme:
- Create a file at
platform/themes/your-theme/lang/es.json - Add translations in JSON format:
{
  "Home": "Inicio",
  "About": "Acerca de",
  "Contact": "Contacto",
  "Welcome to our website": "Bienvenido a nuestro sitio web"
}
Using Translations in Blade Templates
To make your theme translatable, use the __() helper function:
<h1>{{ __('Welcome to our website') }}</h1>
<ul>
    <li><a href="/">{{ __('Home') }}</a></li>
    <li><a href="/about">{{ __('About') }}</a></li>
    <li><a href="/contact">{{ __('Contact') }}</a></li>
</ul>
Using Translations in PHP
In PHP files, you can use the same __() helper function:
echo __('Welcome to our website');Translation with Variables
You can include variables in your translations:
// In your code
echo __('Hello, :name', ['name' => 'John']);

// In your translation file (es.json)
{
  "Hello, :name": "Hola, :name"
}
Best Practices
- Use Simple Keys: Keep translation keys simple and descriptive
- Be Consistent: Use consistent naming conventions for your translation keys
- Context Matters: Include context in your translation keys when necessary
- Use Auto-Translation as a Starting Point: Auto-translation is helpful but may require manual refinement
- Regular Updates: Regularly update your translations as your website content changes
- Test Thoroughly: Test your translations in all supported languages to ensure proper display
- Consider Text Expansion: Some languages may require more space than others, so design your UI accordingly
- Export Regularly: Regularly export your translations as backups
- Document Custom Translations: Keep documentation of any specialized terminology or brand-specific translations