Marketplace Setup
The Marketplace plugin transforms your ecommerce store into a multi-vendor marketplace where multiple vendors can sell products through their own stores.
Overview
The Marketplace plugin enables:
- Multi-vendor architecture - Multiple sellers with individual stores
- Vendor registration - Customers can become vendors and create stores
- Store management - Each vendor manages their own products, orders, and discounts
- Verification system - Optional admin approval for new vendors
- Commission tracking - Platform earns commission on vendor sales
- Vendor dashboard - Separate vendor panel for store management
Activating the Plugin
Navigate to Plugins in the admin panel and activate the Marketplace plugin.
WARNING
The Marketplace plugin requires the Ecommerce plugin to be installed and activated first.
Marketplace Settings
Navigate to Marketplace -> Settings to configure marketplace options.
Vendor Registration
| Setting | Description |
|---|---|
| Enable vendor registration | Allow customers to become vendors |
| Hide become vendor menu in customer dashboard | Hide "Become Vendor" link from customer dashboard menu |
| Show vendor registration form at registration page | Display vendor registration fields on the customer registration page |
| Verify vendor | Require admin approval before vendors can start selling |
| Requires vendor documentations verification | Vendors must upload certificate and government ID documents |
TIP
When "Verify vendor" is enabled, new vendors see a pending approval message until admin verifies their store.
Product Management
| Setting | Description |
|---|---|
| Enable product approval | Vendor products require admin approval before going live |
| Allow vendor digital products | Vendors can sell digital/downloadable products (requires Digital Products enabled in Ecommerce) |
| Max upload filesize | Maximum file size vendors can upload (MB) |
| Max product images upload by vendor | Maximum number of images per product |
| Low stock threshold | When product quantity drops to or below this number, vendor receives a low stock email notification (default: 5) |
| Media file types can be uploaded by vendor | Allowed MIME types for vendor uploads |
Vendor Capabilities
| Setting | Description |
|---|---|
| Allow vendor manage shipping | Vendors can create their own shipping rules |
| Charge shipping per vendor | Calculate shipping separately for each vendor in cart |
| Allow vendor manage product currency | Vendors can set product prices in different currencies |
| Allow vendor delete their orders | Vendors can delete their own orders (not recommended for production) |
Store Pages & Display Settings
| Setting | Description |
|---|---|
| Enable stores listing page | Show the stores listing page (e.g. /stores). When disabled, the page redirects to the homepage and is excluded from the sitemap |
| Hide store phone number | Don't display vendor phone on store pages |
| Hide store email | Don't display vendor email on store pages |
| Hide store address | Don't display vendor address on store pages |
| Hide store social links | Don't display vendor social media links |
| Enable vendor categories filter | Show category filter on vendors listing page |
| Show vendor info at checkout | Display vendor information during checkout |
| Display order total info for each store | Show subtotals per vendor in cart/checkout |
TIP
Disabling the stores listing page does not disable individual store pages. Customers can still visit a specific store via its direct URL (e.g. /stores/my-shop).
Checkout Options
| Setting | Description |
|---|---|
| Single vendor checkout | Customers can only checkout with products from one vendor at a time |
| Enable messaging system | Allow customers to message vendors directly |
Vendor Registration Process
Customer-Initiated Registration
- Customer navigates to "Become a Vendor" (if logged in) or uses registration page
- Fills vendor registration form:
- Shop name
- Shop URL (slug)
- Shop phone
- Certificate file (if documentation required)
- Government ID file (if documentation required)
- Submits registration
- System creates store linked to customer account
- Admin receives notification (if verification enabled)
TIP
When "Show vendor registration form at registration page" is enabled, customers can register as vendors immediately without creating a customer account first.
Admin Approval Flow (if enabled)
If "Verify vendor" is enabled:
- Vendor submits registration
- Vendor sees "Pending Approval" page
- Admin receives email notification and dashboard alert
- Admin reviews vendor at
Marketplace->Unverified Vendors - Admin approves or rejects with optional note
- Vendor receives email notification
- Approved vendors gain access to vendor dashboard
Navigate to: Marketplace -> Unverified Vendors
Store Setup
Admin Creating Stores
Navigate to Marketplace -> Stores -> Create
Store Information:
| Field | Description |
|---|---|
| Name | Store display name |
| Store contact email | |
| Phone | Store contact phone |
| Logo | Store logo (square and standard versions) |
| Cover image | Store banner/header image |
| Description | Short store description (400 characters) |
| Content | Full store description (supports HTML) |
| Status | Published, Pending, or Blocked |
| Customer | Select the customer who owns this store |
Location Details:
- Address
- Country
- State
- City
- Zip code
Business Information:
- Company name
- Tax ID
- Tax country/state
- Certificate file (upload)
- Government ID file (upload)
Verification:
- Is verified (checkbox)
- Verified at (date/time)
- Verified by (admin user)
- Verification note
Social Links:
Configure allowed social platforms at Marketplace -> Settings
WARNING
When a store status is changed to "Blocked", all published products from that store are automatically blocked as well.
Vendor Store Management
Vendors manage their stores at: https://your-site.com/vendor/settings/store-settings
Vendors can update:
- Store name, logo, and cover image
- Contact information
- Store description
- Social media links
- Tax information (in Tax Information tab)
- Payout information (in Payout Information tab)
Store Verification
Admin can verify or unverify stores from the store detail page. Navigate to Marketplace -> Stores -> click a store name to view its detail page.
The Store Verification card on the left sidebar shows the current status:
- Not Verified — Displays a warning indicator with a "Verify Store" button
- Verified — Displays a success indicator with verified-by name, date, optional note, and an "Unverify Store" button
Verifying a Store
- Navigate to the store detail page (
Marketplace->Stores-> view store) - In the Store Verification card, click Verify Store
- A confirmation modal appears — optionally add a verification note
- Click confirm to verify
The store is marked as verified with a timestamp and the admin's name. An email notification is sent to the store owner.
TIP
Verification badges appear next to verified store names on the frontend.
Unverifying a Store
- On the store detail page, click Unverify Store in the verification card
- A confirmation modal appears — optionally add a reason note
- Click confirm to unverify
The vendor receives an email notification with:
- Unverification reason (from the note field)
- Contact URL to reach support
Admin Store Management
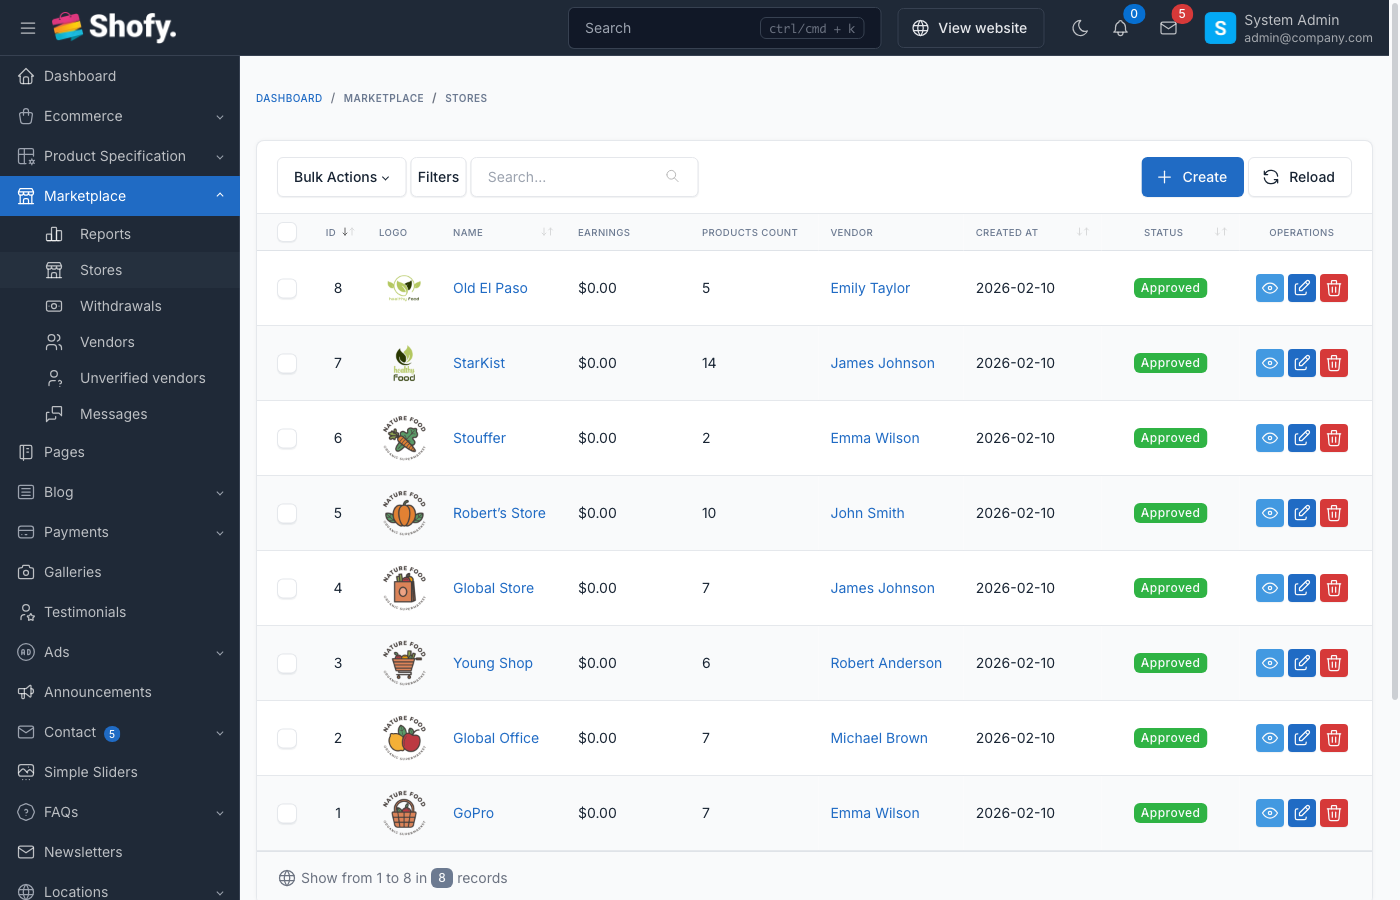
Navigate to Marketplace -> Stores
Bulk Actions:
- Delete selected stores
Per Store Actions:
- Edit store details
- View store products
- View store orders
- Verify/unverify store
- Delete store
WARNING
Deleting a store will:
- Delete all store products
- Delete all store discounts
- Remove store reference from orders (orders remain)
- Delete store's upload folder
Marketplace vs Single-Vendor Mode
Multi-Vendor Mode (Default)
- Multiple stores can exist
- Each vendor manages their own products
- Commissions are tracked per vendor
- Orders can contain products from multiple vendors
- Each vendor has their own revenue tracking
Single-Vendor Mode (Single Vendor Checkout)
Enable "Single vendor checkout" in settings:
- Customers can only add products from one vendor at a time
- Adding a product from a different vendor clears the cart
- Simpler checkout experience
- Reduces shipping complexity
Store Pages
Stores Listing Page
The stores listing page is accessible at: https://your-site.com/stores
This page shows all published stores with search functionality. You can disable it entirely in Marketplace -> Settings by turning off Enable stores listing page. When disabled:
- The
/storesURL redirects to the homepage - The stores URL is removed from the sitemap
- The "Stores" breadcrumb link is removed from individual store pages
Individual Store Pages
Individual stores are accessible at: https://your-site.com/stores/{store-slug}
The store page displays:
- Store logo and cover image
- Store information (based on privacy settings)
- Store products
- Store reviews (from product reviews)
- Social links (if not hidden)
TIP
Individual store pages remain accessible even when the stores listing page is disabled.
Vendor Dashboard
Vendors access their dashboard at: https://your-site.com/vendor/dashboard
Default Dashboard URL is /vendor/ but can be changed via .env:
MARKETPLACE_VENDOR_PANEL_DIR=sellerThis changes the URL to /seller/dashboard
Vendor Tax Management
Vendors can manage their tax information from the vendor dashboard.
Vendor Tax Information Tab
Navigate to: Vendor Dashboard -> Settings -> Tax Information
Vendors can configure:
| Field | Description |
|---|---|
| Business Name | Legal business name for tax/invoicing |
| Tax ID | VAT/GST/Tax ID number |
| Tax Address | Registered business address for tax purposes |
This information appears on invoices and is used for tax compliance.
Admin Tax Configuration for Vendors
Navigate to Marketplace -> Stores -> Edit Store:
| Field | Description |
|---|---|
| Tax ID | Vendor's tax registration number |
| Tax Country | Country of tax registration |
| Tax State | State of tax registration |
TIP
Vendor tax location is used by the tax engine for seller-based tax jurisdictions (e.g., US origin-based sales tax).
How Tax Works in the Marketplace
- Admin controls all tax rates - Tax classes and rules are set globally by admin
- Vendors assign tax classes - When creating products, vendors select from admin-configured tax classes
- Automatic calculation - Tax is calculated at checkout based on customer location and product tax settings
- Per-product tax - Each product can have different tax classes (Standard, Reduced, Zero Rated, Exempt)
For full tax configuration details, see: Tax Configuration
Vendor Shipping Management
Shipping Settings
Navigate to Marketplace -> Settings:
| Setting | Default | Description |
|---|---|---|
| Allow vendor manage shipping | OFF | Let vendors update shipment status and tracking |
| Charge shipping per vendor | ON | Calculate shipping separately per vendor in cart |
Per-Vendor Shipping
When Charge shipping per vendor is enabled:
- Cart groups items by vendor
- Shipping calculated independently per vendor
- Customer sees shipping options for each vendor
- Total shipping = sum of all vendor shipping fees
Example checkout:
Store A - Standard Delivery: $5.00
Store B - Express Shipping: $12.00
─────────────────────────────────
Total Shipping: $17.00
Vendor Shipment Dashboard
Vendors manage shipments at: Vendor Dashboard -> Shipments
Full access (when "Allow vendor manage shipping" = ON):
- Update any shipment status (Pending → Delivering → Delivered)
- Add tracking information (tracking ID, carrier name, tracking link)
- Manage COD (Cash On Delivery) payment status
- Set shipping and estimated delivery dates
Limited access (when "Allow vendor manage shipping" = OFF):
- Can only set status to
Arrange ShipmentorReady to be Shipped Out - Admin handles full shipment lifecycle
Adding Tracking Information
Vendors can add carrier tracking details per shipment:
| Field | Example |
|---|---|
| Shipping Company Name | FedEx, DHL, UPS, Vietnam Post |
| Tracking ID | 1Z999AA10123456784 |
| Tracking Link | https://www.fedex.com/track?id=... |
| Estimate Date Shipped | 2026-03-10 |
Customers see tracking info in their order details on the frontend.
Vendor Shipping Rules
When Allow vendor manage shipping is enabled, vendors can create their own shipping rules from their dashboard, following the same rule types as admin:
- Based on Price - Shipping cost by order subtotal
- Based on Weight - Shipping cost by total weight
- Based on Location - City/state-specific rates
- Based on Zip Code - Zip code range pricing
- Based on Zip Code and Weight - Combined calculation
For full shipping configuration details, see: Shipping Methods
Low Stock Notifications
Vendors automatically receive email notifications when their product inventory drops below the configured threshold after an order is placed.
How It Works
- A customer places an order that reduces a vendor's product quantity
- The system checks if the product's quantity is at or below the low stock threshold (configured in Marketplace Settings)
- If the product uses storehouse management and belongs to a store, an email is sent to the vendor's store email
- A 24-hour cooldown prevents duplicate notifications for the same product
Configuration
Navigate to Marketplace -> Settings and set the Low stock threshold value. The default is 5.
This threshold also controls the vendor dashboard's inventory status widget, which categorizes products as "In Stock", "Low Stock", or "Out of Stock".
Email Template
The low stock notification email template can be customized at Settings -> Email -> Marketplace -> Low stock notification.
Available template variables:
| Variable | Description |
|---|---|
| Vendor's store name |
| Product name |
| Link to the product |
| Current remaining quantity |
| The configured threshold value |
TIP
The notification can be disabled per email template. Navigate to Settings -> Email -> Marketplace and toggle off the "Low stock notification" template.
Troubleshooting
Vendor Registration Not Showing
- Check "Enable vendor registration" is ON in settings
- Verify customer is logged in (if not using registration page integration)
- Check "Hide become vendor menu in customer dashboard" is OFF
Vendor Stuck on Pending Approval
- Check "Verify vendor" setting - if enabled, admin must approve
- Navigate to
Marketplace->Unverified Vendorsto approve - Verify vendor uploaded required documents (if documentation verification enabled)
Products Not Appearing
- Check store status is "Published"
- Check product status is "Published"
- If "Enable product approval" is ON, admin must approve vendor products
- Verify vendor has been approved (if verification enabled)
Store Page Returns 404
- Verify store has a slug set
- Check store status is "Published"
- Clear cache:
php artisan cache:clear
Best Practices
- Enable verification for quality control on new vendors
- Require documentation to verify vendor legitimacy
- Use product approval initially to maintain quality standards
- Set reasonable file size limits to prevent server storage issues
- Hide sensitive contact info to prevent vendor poaching
- Enable messaging system for customer-vendor communication
- Use single vendor checkout if shipping complexity is an issue